


This is my quick review of my build of the Do It Yourself Peter Purpose Laz EQN-1084 EQ. This EQ is an ‘inspired clone’ of the famous classic Neve 1084 EQ. I say inspired because it is not a true copy of the original. For example, it has additional frequencies, cosmetically does not look the same and I am not using an exact copy of all components used on the original.
Information on the EQN from Laz Pro’s website
Group DIY forum support thread
I do not have an original Neve 1084 EQ to compare it with but overall, I’m very happy with the result in sound! I use this on its own to sweeten individual tracks during mix down or use the high cut filter for tracking. I have also used this to apply some EQ on tracking vocals and instruments but I try not to print EQ on anything I track unless I am confident it is the sound I want or I am experimenting with new sounds or textures. So far, I have been able to use this for both vocals and live and electronic instruments. I think there is enough frequency selection on this unit to cover most tasks.
It definitely sounds sweet and not harsh which I have noticed with budget EQs especially when you are boosting frequencies in large amounts. I saved a few hundred dollars compared to if I had to buy a similar commercial EQ on the market which was the main incentive why I built this unit. I wanted to complete my Neve quest for that ultimate Pre and EQ set which the Neve 1073 is highly talked about in a lot of forums and pro-audio circles. I use this with my NV73 DIY build which is the 1081 preamp clone(preamp section of the 1073). It’s a nice combination. I have also used this in combination with my Great River ME-1NV (‘inspired modern’ 1073) and API 512c preamps and so far, I’m liking the results! The unit is pretty quiet and the only noise I could hear is from the preamp its paired with or the sound source I am recording.
I do find the knobs a little cramped on it and users with thick fingers may find it difficult to use but there may be smaller knob options out there than the ones I have used to improve on this issue. I guess it’s hard for designers to avoid this problem taking into consideration how much real estate they have to play with. When using the unit, I would have liked to see a clip led in-between the two top frequency knobs to tell me if a signal is peaking and also to add to the look of the unit in use but regardless of these issues mentioned, the unit works fine as it is.
If you are into building electronic gadgets and enjoy the whole process of DIY, this is not a bad EQ to build. I bought the kit version which had pretty much most parts and all I had to do was buy the remaining parts from a couple of sources like Audio Maintenance for the 1084EQN partial kit. I would say this electronic project is intermediate level and this is coming from a person with some electronic build experience and not a professional. I do not understand the whole electronics theory side of things and some people have called me more like a ‘paint by numbers’ kind of builder but luckily there are some really helpful and friendly people over at Groupdiy/Prodigy that are there to guide or help you if you get stuck on the theory side of things! I think doing this build now will be easier than when it was first released because there is a lot more information about the whole build process which can help you avoid some common pitfalls and help a person understand this build better.
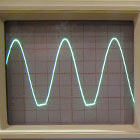
The build has some tight spaces of soldering needed, there are a few PCB boards and components to solder and you need to calibrate the unit when completed. I had to buy an oscilloscope to calibrate this unit which I found calibration difficult to understand at the start. I think this build took me over 8 months to complete but this was because I was waiting for parts, doing some research, working on multiple projects, troubleshooting and buying an oscilloscope. A lot of the time used would be mostly made up of waiting and the actual build and calibration process would probably only takes a few days if you are well prepared, already have all the parts, understand what to do and you do not have to troubleshoot the unit.
In the end, the build looks great in my API lunch box, it didn’t cost me an arm and a leg, there were some frustrating build moments and the unit sounds great!
I recommend reading any article and forum thread on building this unit, and taking notes on important things. This may help you avoid common mistakes made, save you from buying the wrong components and help you build the unit more smoothly.
Note: There is currently ‘The James Fix’ for this unit to fix an issue it has on certain EQ settings. It’s an easy mod as shown in the pic below and it’s best to do while you are building the unit. I added mine after I finished building the unit but it wasn’t that hard to add the fix anyway.


Feedback
*To embed code in Feedback, insert code between "pre" tags.