Disclaimer
The writer of this article cannot be held responsible for for any form of damages that may result from the use of the information in this article. By reading this article, the user is effectively in agreement that the writer is completely exempt from any liability. If you do not agree, then do not read this article!
Disclaimer
It is important to use a Multi-meter and measure the output voltages of all areas in your build and ensure the polarity is corresponding to requirements of the circuit board, power source, iFocus-M Motor, or any device used in this Article.
I am only showing what worked with my equipment and it may not work with yours, so if you decide to do this DIY build, then attempt it at your own risk and responsibility.
Introduction
In this article I discuss how I made two DIY variants of the power supply cable for the iFocus-M Motor so that it can be powered independently without connecting it to a Moza Gimbal. I also provide instructions on how to pair the iFocus-M Motor with the Moza Wireless Handunit.
The two variants I am referring to are the Moza iFocus-M DC 5V to 8V Power Supply Cable and a new Direct iFocus M Power Supply Cable that allows me to power the iFocus-M Motor direct from an 8 volt power source.
If you have not purchased the Moza Handunit or iFocus-M Motor, then I would suggest that you first read the review on the Moza Wireless Follow Focus Handunit (MF02) prior to purchasing. The Article is located at https://learnlikeme.com/index.php/moza-wireless-follow-focus-handunit-mf02-review/
The reason I decided to create a DIY power cable for the Moza iFocus-M Motor was because of the $50 AUD / $38.50 USD (including tax and shipping) price to purchase the Moza iFocus-M DC 5V to 8V Power Supply Cable from Moza.
This Moza propriety cable will allow you to USB power the iFocus-M Motor without attaching the motor to the Gimbal. This expands the iFocus-M Motor capabilities from being a Gimbal only focus motor to a Wireless Follow Focus System if you pair it with the Moza Wireless Handunit.
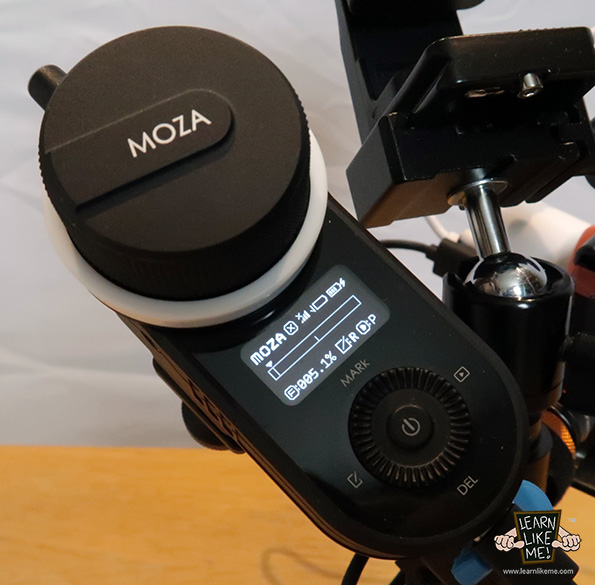
If you are interested in producing these cables and you do not have skills in soldering and making cables, then I would suggest that you practice some soldering techniques using dummy cables and old circuit boards to get familiar with soldering and cable making.
This DIY power cable is not limited to only 5 volts to 8 volts voltage conversion but it can also be used in making a Boost/Step-up cable with the following voltages;
- *Input 3.7V battery, output 5V 1A, 8V 0.5A, 9V 0.45A, 12V 0.3A
- *Input 5V, output 8V 0.7A, 9V 0.7A, 12V 0.5A
* voltage and amps may vary depending on the Step-up board used.
Parts List
The following parts I used is a combination of old parts I had lying around at home and parts I purchased online, and at my local electronics or hardware store.
- USB Cable (used an old USB cable)
- 2.1 x 5.5mm Male DC Plug – Jaycar
- 2.1 x 5.5mm Female DC Plug – (used the DC plug from a broken Power Adaptor)
- 3.5mm TRRS (4 Pole) Plug (used an old Video Camera cable)
- Heatshrink – Jaycar or Bunnings
- Boost module indicator Step-Up Board (3.7v, 5v, 8v, 9v, 12v) – purchased at AliExpress $1.54 AUD including shipping and tax.
Equipment Used
- Soldering Iron and Solder
- Heat Gun (can use a Hairdryer to heat heatshrink)
- Cable Cutter for cutting and stripping wires.
- Cable ties
- Multi-meter
- Stanley Knife
- USB Power Bank (optional)
- NP-F Batteries to V-mount Plate (optional)
- NP-F Batteries (optional)
- D-Tap to DC 8.4v Cable (optional)
3.5mm TRRS (4 Pole) Plug
The TRRS, 4 Pole plug connects directly to the iFocus-M Motor and provides the necessary 8 volts to power the motor.
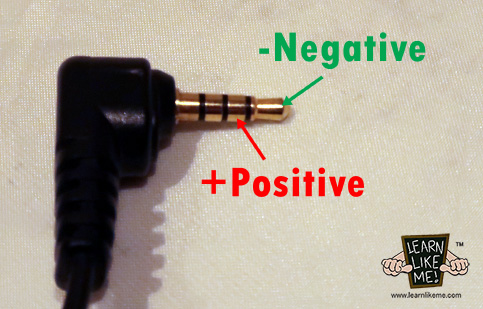
I found the voltage and wiring needed for the DIY power cable by setting up the Moza Aircross 2 gimbal and connecting the provided Moza Multi-CAN cable to the Gimbal and finding which part of the TRRS plug of the Moza Multi-Can Cable provides the 8 volts by using a Multi-meter. I recommend you do the-same if you are considering making these cables to confirm the wiring, polarity and necessary voltage required for your unit.
Moza iFocus-M Power Cable – direct connect to an 8v power source.
This iFocus-M Power Cable allows you to connect the iFocus-M motor directly to an 8 volts power source. I use this cable to connect the iFocus-M motor directly to my NP-F Batteries V-Mount Plate or V-Mount Adaptor Plate which can output 8 volts directly.
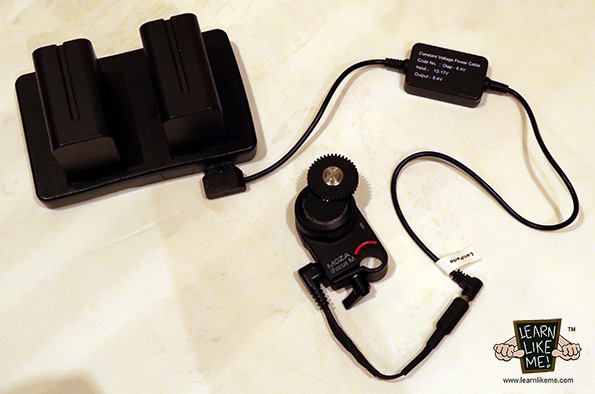
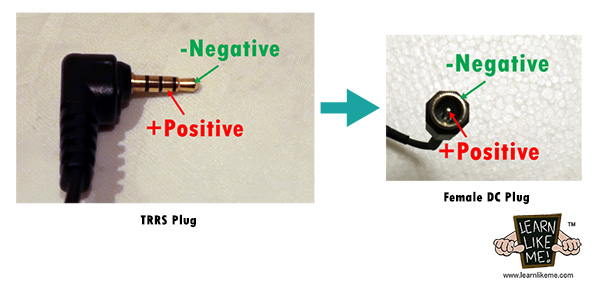
I used an old Power Adaptor that was broken which had a 2.1 x 5.5mm Female DC Plug attached to it. I cut the plug end leaving enough cable to attach a 2.1 x 5.5mm Male DC Plug to it.
I inserted the heatshrink first to the cables before I soldered the Male DC Plug to the cable with the Female DC Plug already attached. I used a Multi-meter to test that the positive and negative wiring matches the diagram below.
Once I have confirmed the wiring is correct, I use the heatgun to heat the heatshrink and test it using an N-PF Battery Plate, N-PF Batteries, iFocus-M Motor and Moza Wireless Handunit.
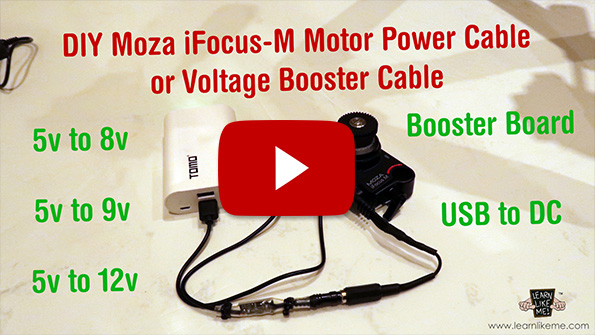
Please watch the following video that demonstrates how to pair the Moza Handunit with the iFocus-M Motor and using the Do It Yourself Moza iFocus-M Power Cable I made.
DC 5V to 8V Power Supply Cable – boost DC 5 volts to 8 volts.
The Moza iFocus-M DC 5V to 8V Power Supply Cable allows me to connect the iFocus-M Motor to a USB Power Bank, USB Power Adaptor, V-Mount Plate with USB out, Laptop or Computer USB out and a V-Mount Battery with USB out.
There is a Booster Step-Up circuit board used that will increase the 5 volts USB power source to either 8v, 9v or 12v depending on how I have configured the A and B section of the circuit board. This feature allows me to use this design for other Step-Up voltage applications.
For the purpose of using it with the iFocus-M motor, the voltage boost must be set to 8 volts.
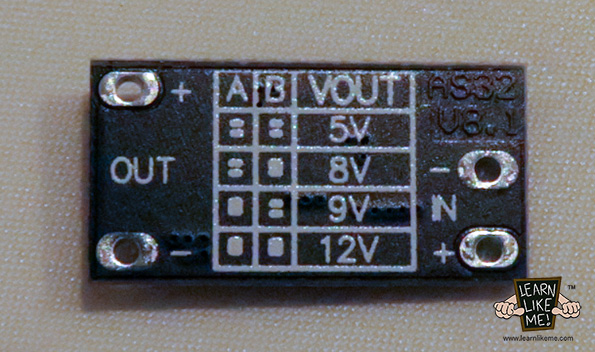
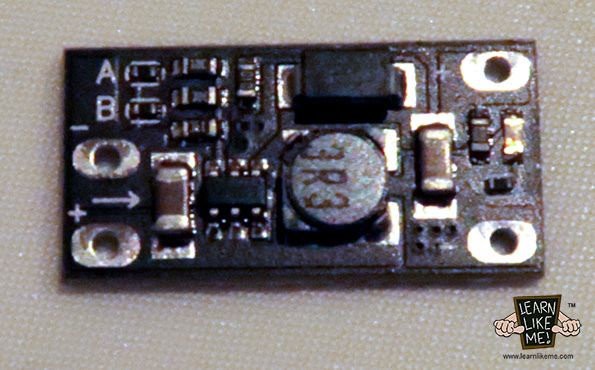
To configure the board for 8 volts boost requires the disconnection of the A section of the board. My board came with the A and B section already connected, so I used a Stanley knife to break the A section connection. Other Booster Step-Up boards in the market requires you to solder the A or B section together to get the desired voltage output rather than manually remove the A or B connections.
Here is the diagram I used to create this cable.
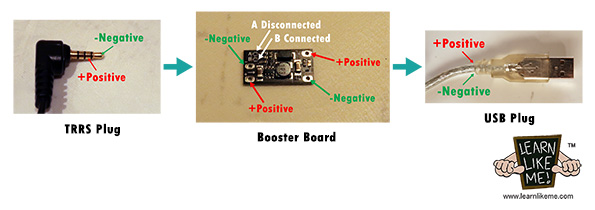
* please make sure to wire it according to your Booster Board’s IN and OUT wiring. The diagram above only shows where the board is positioned within the cable. The TRRS plug, should be going to the OUT of the Booster Board and the USB plug should be going to the IN of the Booster Board in my example!
I cut an old USB cable at my desired length and used a Multi-meter to find which positive and negative wire produced the 5 volts by connecting it to a USB source.
I protected the Booster Board in my cable by wrapping it in Heatshrink and securing the ends using cable ties.

* Please note, that the recommended USB power source should be able to provide 5 volts at 2amps or more.
Moza iFocus-M DC 5V to 8V Power Supply Cable Set – boosts a 5v USB source to an 8v Multi-CAN plug output.
This cable requires the Moza iFocus-M Power Cable to provide the plug connection to the iFocus-M Motor.
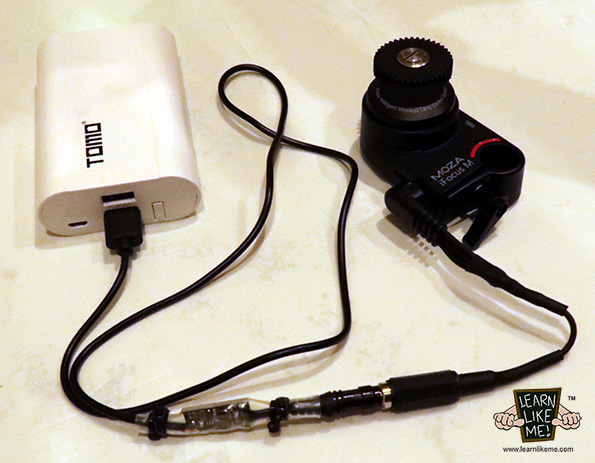
With both cables connected in series, this will allow me to connect the iFocus-M motor to a USB 5 volts power source. The use of the Booster Step-Up circuit board will increase the voltage from 5 volts to 8 volts which is the voltage requirement to run the iFocus-M Motor. Please note, that the recommended USB power source should be able to provide 5 volts at 2amps or more.
The Moza iFocus-M DC 5V to 8V Power Supply Cable allows me to connect the iFocus-M Motor to a USB Powerbank, USB Power Adaptor, V-Mount Plate with USB out, Laptop or Computer USB out and a V-Mount Battery with USB out.
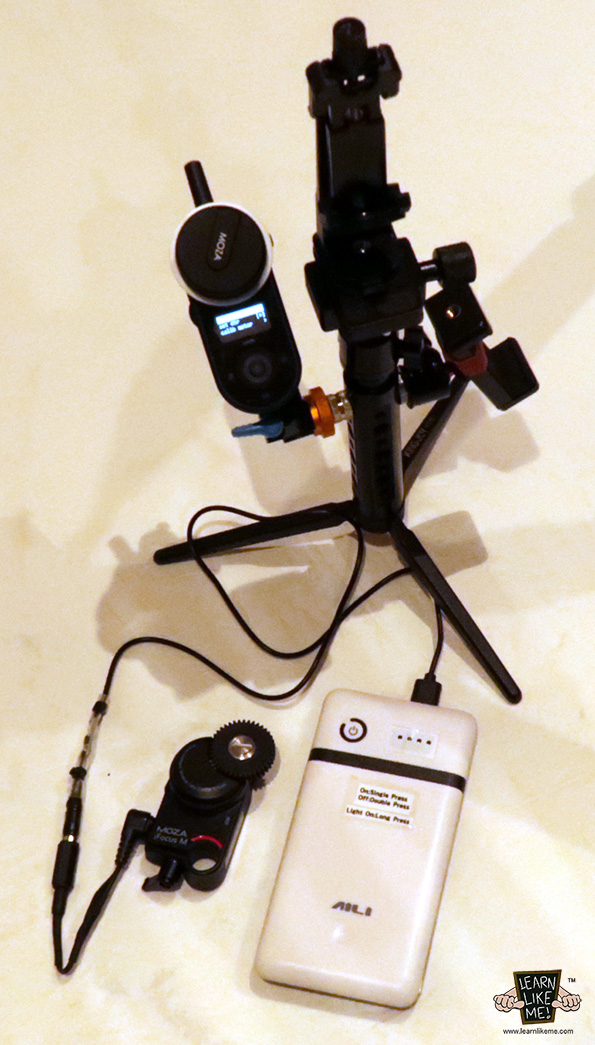
Here is the diagram I used to create this cable.
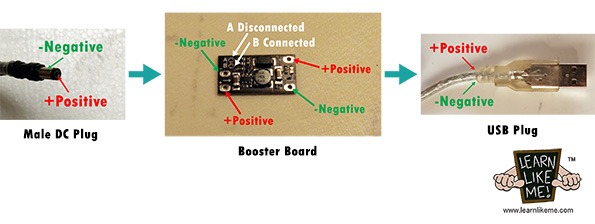
* please make sure to wire it according to your Booster Board’s IN and OUT wiring. The diagram above only shows where the board is positioned within the cable. The DC plug, should be going to the OUT of the Booster Board and the USB plug should be going to the IN of the Booster Board in my example!
Here is the configuration needed in order to use the cable set with the Moza iFocus-M Motor and a USB Power Source.

* please make sure to wire it according to your Booster Board’s IN and OUT wiring. The diagram above only shows where the board is positioned within the cable. The DC plug, should be going to the OUT of the Booster Board and the USB plug should be going to the IN of the Booster Board in my example!
It is important that you check your Booster Board’s manual or contact the Seller for the correct wiring for your board, as boards can differ between manufacturers or suppliers!




Feedback
*To embed code in Feedback, insert code between "pre" tags.