Disclaimer
The writer of this article cannot be held responsible for for any form of damages that may result from the use of the information in this article. By reading this article, the user is effectively in agreement that the writer is completely exempt from any liability. If you do not agree, then do not read this article!
Introduction
Initially I was considering purchasing a Camera Suction Car Mount found online but I decided not to purchase one in the end because it uses the generic clear suction cups that you find with the plastic Mobile/GPS suction mounts.
My previous experience with these types of mounts were that they were not durable or reliable after a few months worth of use. The plastics used in the suction cups had a tendency to lose its shape which made them unreliable when used.
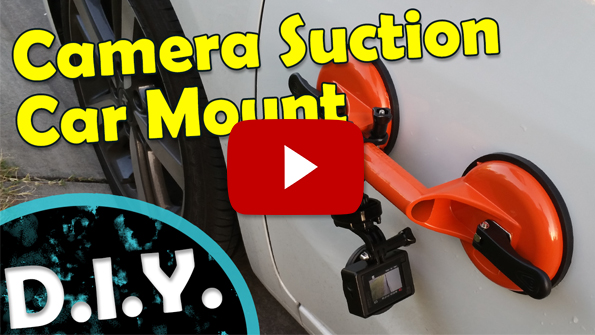
I decided to go DIY after researching on possible alternatives to the suction cups. The suction cups system I used were those of the Glass Lifters found at your local hardware stores. These devices are used to help carry flat pieces of glass and in some cases used by Panel Beaters for reshaping car panels. They are rated to hold 100kgs unlike the plastic action camera suction mounts you purchase online that can only hold a few kilos.
I purchased a dual glass lifter made of metal online as they sold them cheaper compared to my local hardware store. Using parts from the GoPro mounting system, I was able mount my action camera to the glass lifter.
Parts List
Main
- Suction Glass Lifter
- Bike handlebar mount for Gopro
Arca Quick Release setup
- Tripod Mount Adaptor – to connect from handlebar mount to Arca Quick Release clamp
- Arca Quick Release Clamp
- Arca Quick Release Plate
- Tripod Mount Adaptor – to connect GoPro to Arca Quick Release Plate
There are variations you can do with this build such as;
– using metal parts for the clamps or mounts which will help with durability,
– use a GoPro tripod mount attachment that will allow you to integrate the tripod system, such as attaching a ball head or tripod quick release system.
Issues
Some of the issues I encountered was that the GoPro mounting system is prone to losing its camera position on hard bumps. This is most noticeable when attaching a ball head that adds more weight to the setup. The force from the bumps on the road would nudge the joints of the mount into a different position.
One way to negate this issue is to glue the GoPro mount joints permanently into one position and rely on the ball head for positioning. The ball head needs to be able to widthstand a good weight payload though, as this could be prone to movement due to bumps on the road.
Another issue I encountered is finding a surface on the car that allows me to attach both suction cups securely. You may come across a situation where only one suction cup can be mounted properly to get the camera angle you want. If this is the case, you may need to make a decision whether it is worth the risk to rely on one suction cup or find a different location on the car where both suction cups can be mounted securely. I did try it with one suction cup on the windshield and it held up fine, but I would still recommend finding an alternate location on the car if you can where both suction cups can be securely attached.
This is probably the reason why I noticed some of the commercial camera suction mounts have joints or pivots at each suction cup. This allows the suction cup to angle independently from the mount allowing it to custom fit to the shape of the surface. I may consider building a two single glass lifter version with a support bar for the camera but my concern in the build is where the suction cups connect to the support bar. These connecting joints must be able to tighten into a locked position otherwise it will be a weak point for shakes and vibrations when in use.
Using a heavier camera setup – DSLR or Mirrorless camera setups
This build could hold a Mirrorless camera, but I would use safety precautions such as using a lanyard attached to the camera and the car and ratchet straps that can secure the car mount firmly against the car. I would use metal clamps and metal mounts for better durability and security, as well as a good quality ball head with heavy payload for easier positioning of the camera.
Safety
It is important to secure the car mount further to the car for safety. You can either use a ratchet strap around the camera mount that is securely attached to the car or attach a lanyard to the camera that is securely connected to the car. Not only will this be a safety precaution for your equipment incase the car mount falls but it may also help prevent a car accident from happening.
Please feel free to watch the video above as it contains sample footage and other points that I have not outlined in this article.


Feedback
*To embed code in Feedback, insert code between "pre" tags.