Disclaimer
The writer of this article cannot be held responsible for for any form of damages that may result from the use of the information in this article. By reading this article, the user is effectively in agreement that the writer is completely exempt from any liability. If you do not agree, then do not read this article!
Introduction
In this article I will show you how I made an affordable teleprompter using parts I found online and at local stores.
Please read this article fully first and examine the images supplied to help visualise the steps, choose the appropriate parts for this build and decide whether this build is right for you.
Apologies for the images that may not line up with the steps of the build, as I decided to change the steps after completing the teleprompter because I felt these newer sequence of steps to be more appropriate.
Parts List
|
Part |
Notes |
Source |
|
2 X Picture frames |
Choose an appropriate size picture frame that can fit the mobile device you are going to use. |
Target, Ikea, Kmart, Ebay |
|
2 X Small hinges |
Use to connect both picture frames together to create a fold out picture frame. |
Bunnings, Ebay, Mitre 10 |
|
2 X Lid support hinges |
Allows you to open and lock the picture frame at an angle. |
Ebay |
|
Foam |
Cut to the size of the inside of the frame. This will be used to support and grip the mobile device such as a mobile phone or tablet. |
Clark Rubber, Ebay |
|
2 X Document clips |
To secure the teleprompter hood into place. |
Officeworks, Kmart |
|
50cms X 110cms of Black raincoat cloth |
To create the teleprompter hood to block unwanted light. |
Spotlight |
|
Quick Release plate |
Arca plate, Manfrotto 501 plate – to attach the teleprompter onto a light stand or tripod. |
Ebay, Amazon, Camera Store |
|
2 X ¼ thread size round head bolt and nut |
To secure the quick release plate onto the teleprompter bottom. |
Bunnings |
|
PVA Glue |
To attach the foam to the bottom teleprompter frame. |
Bunnings |
|
Prescription glasses cleaning fluid |
Cleaning the glass. |
Specsavers, Chemist Warehouse |
|
Glasses cleaning cloth |
Cleaning the glass. |
Specsavers, Chemist Warehouse |
|
Metal Coat hanger |
Support for the hood, so that the cloth does not droop in front of the lens. |
Coles, Woolworths, Kmart, Target |
|
Heat shrink tube |
Adding grip to the hood support so that it can lock into place on the teleprompter frame and also protect your lens from scratches. |
Jaycar, Radio Parts, Bunnings |
|
17′ Neoprene Laptop Case |
For storage or transport of the Teleprompter and accessories. |
Ebay, Amazon, JB Hifi, Kmart |
|
Mirror corner Hangers (optional) |
For slightly larger glass than the original picture frame glass such as Glide Gear Beam Splitter Glass. |
Bunnings |
|
Teleprompter App |
DV prompter – search the app store for other free apps more suitable to your needs. |
Google Play Store, App Store |
Instructions
Teleprompter Frame
Picture Frame 1 will be used as the top of the teleprompter. The glass side will be facing the inside of the teleprompter. Remove the wooden backing, leaving the glass in the frame only.
Add heat shrink to the metal frame locking tabs to prevent the tabs from scratching the glass.
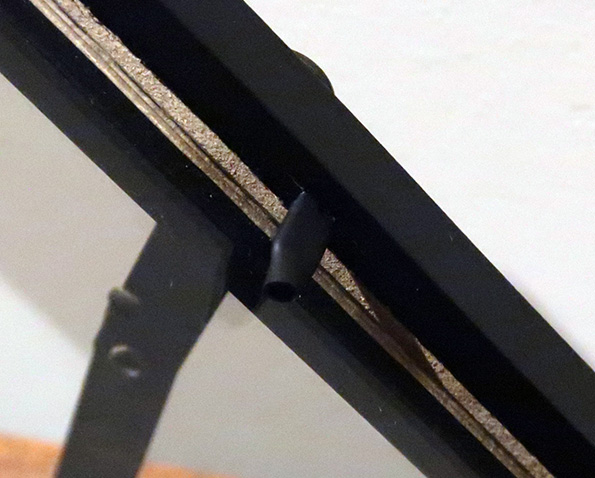
Picture Frame 2 will be used as the bottom of the teleprompter. Even though the glass is removed on this frame, the glass side will be facing the inside of the teleprompter.
Remove the glass and use the wooden backing from the top frame and also this frame, to create two layers of wooden backings for this bottom teleprompter frame. Glue them together and also onto the picture frame.
Make sure the wooding backing is glued to the same location where it originally came from on this frame. Do not glue the 2 layer wooden backing on the side of the frame where the glass use to be!
Press the frame locking tabs into place so that the wooden backing is secured to the frame. Allow the glue to dry for at least 48 hours.
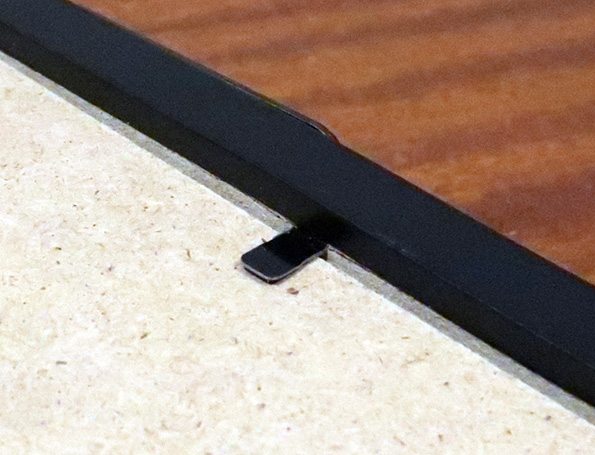
Once the glue has dried, position both picture frames on top of each other where the front of each frame(glass side) are facing each other.
Using the 2 small hinges, attach both frames together at the long side and inside of the picture frame. Position them about 3cms from each end.
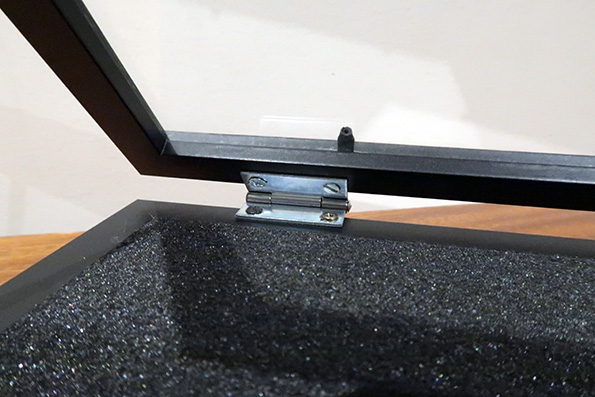
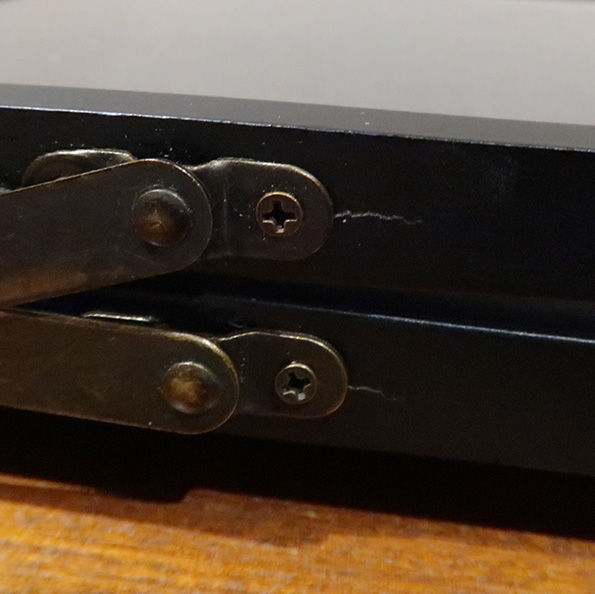
I recommend pre-drilling smaller holes into the wooden frame first when using screws, as there is a tendency for the wood to crack.
Position the quick release plate onto the wooden backing so that the plate is at the middle of the frame.
Mark for two holes on the wooden backing where two bolts can be used to attach the quick release plate to the wooden backing.
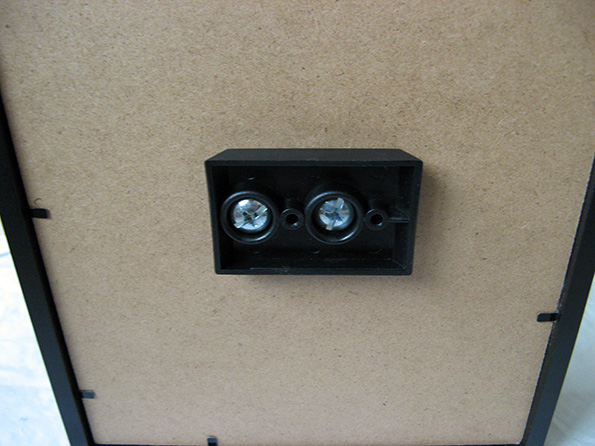
Drill holes where you have made the marks, so that the 1/4 thread bolts could slide through it. On the same holes, drill a countersunk hole on the wooden backing that faces the inside of the teleprompter so that the nuts can fit inside it without protruding out.
Screw the quick release plate onto the backing using the 2 X ¼ thread bolts and nuts and mark where the bolts protrude out of the wooden backing.
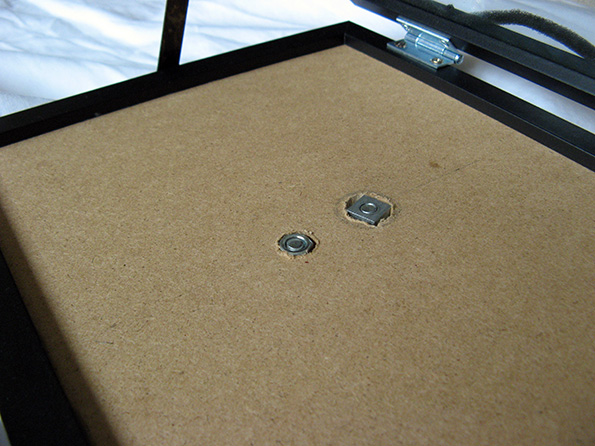
Undo the bolts and cut them to size so that when installed, they do not protrude from the backing as shown below. This will ensure that when the foam is attached, that it lays flat on the bottom frame.
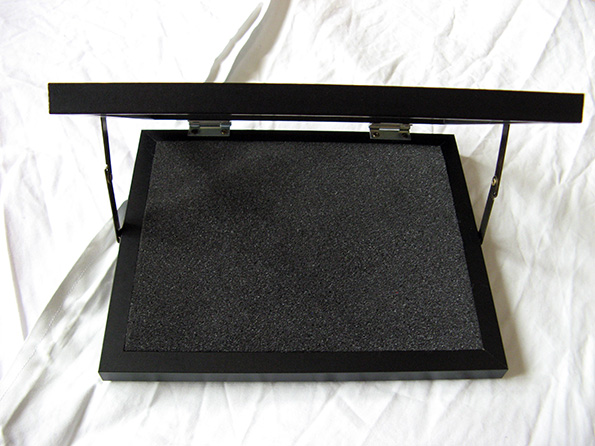
Cut a piece of foam to fit inside the bottom picture frame. Glue the foam onto the bottom picture frame.
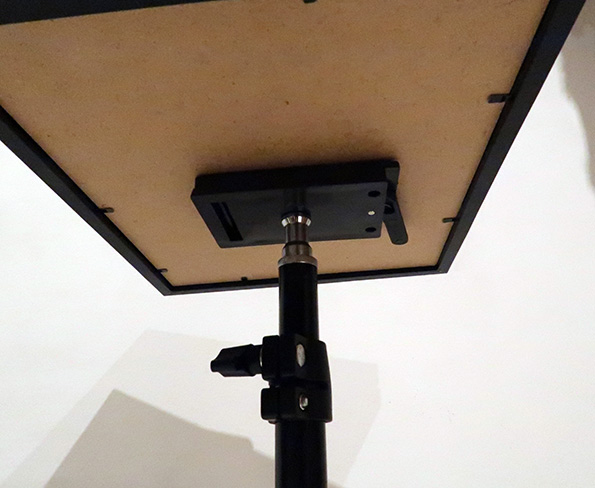
Attach the teleprompter onto a light stand or tripod.
Place a mobile device such as a tablet that has a teleprompter app installed, onto the bottom frame of the teleprompter where the foam is. Run the teleprompter app.
Position yourself at eye level in front of the teleprompter where your talent would most likely be viewing it to read. Open the teleprompter and find a suitable top frame angle where the text looks acceptably proportional, vertical and not stretched out whilst still having as much glass surface upright.
The reason why, is that the more upright the glass is, means you have a bigger window for the lens to look through. The glass will also be able to capture a greater area of the bottom frame, but this increase can result in the text being stretched out which is why you need to find a balance.
The best top frame angle I was able to achieve where the text looked best, and provided an acceptable amount of window height for the lens to look through was only able to provide, approximately 60% coverage of the tablet height.
If you look at the example below, the mobile device is positioned at the very front of the bottom frame, but only the last line is reflected on the teleprompter as that is where the top of the glass finishes.
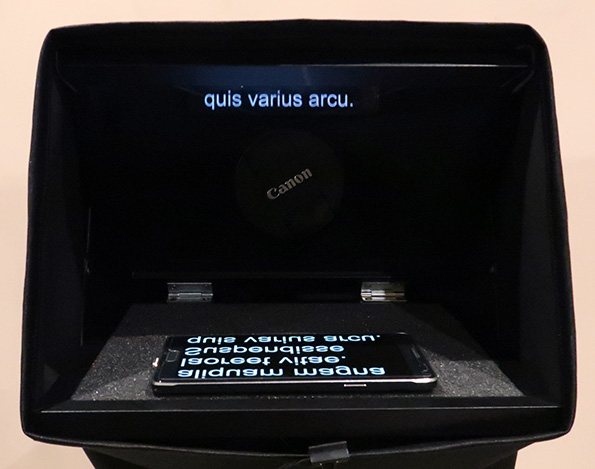
Does this matter? It would, if it was a commercial product and you paid for it, but for a DIY project, the area it reflects is sufficient enough as it provides enough text from the top and bottom of the lens at a decent font size.
I have noticed that reading from the teleprompter, looks most natural when your eyes are directed just above the middle of the lens or just above the lens rim. This can depend though on the position and angle of the talent and camera.
Once you have found the appropriate angle for the frame, position the lid support hinges into place at the sides of the frame where the distance of each lid support hinge is the same from each end.
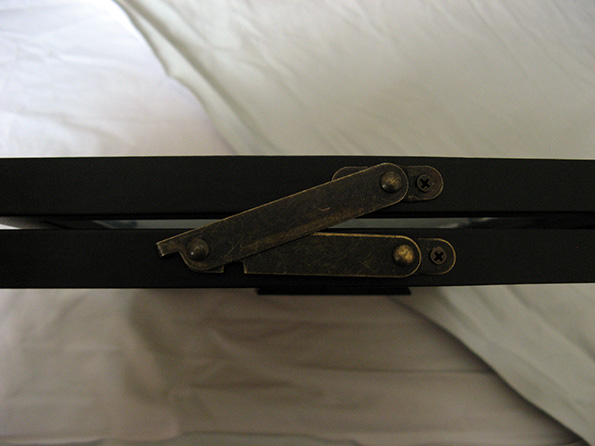
It is important that the lid support hinges are positioned evenly, to ensure that they open and close properly, and keep flush with the frame.
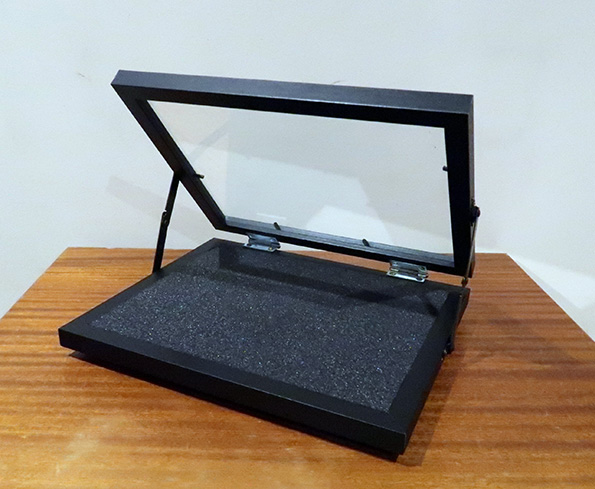
Try to do this as accurate as possible, as you do not want the glass to display the text in an angle when in use.
Set up the teleprompter and camera as though you are using it and make any find adjustments necessary.
Hood Support
Find an old cheap metal coat hanger and cut it and bend it into a V-shape where the bottom of the V is flat for at least 1-2cms.
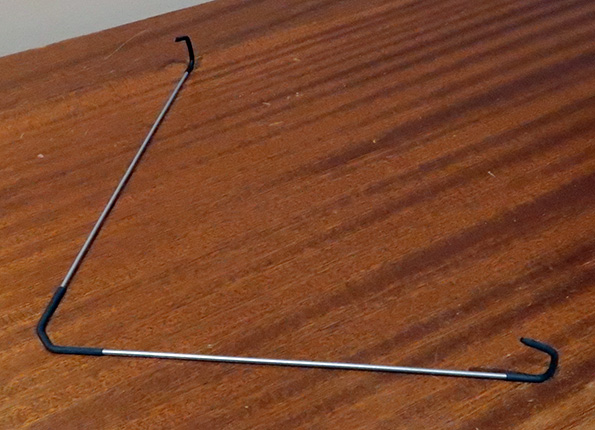
Bend the top arms of the V so that it can wrap around the frame when mounted.
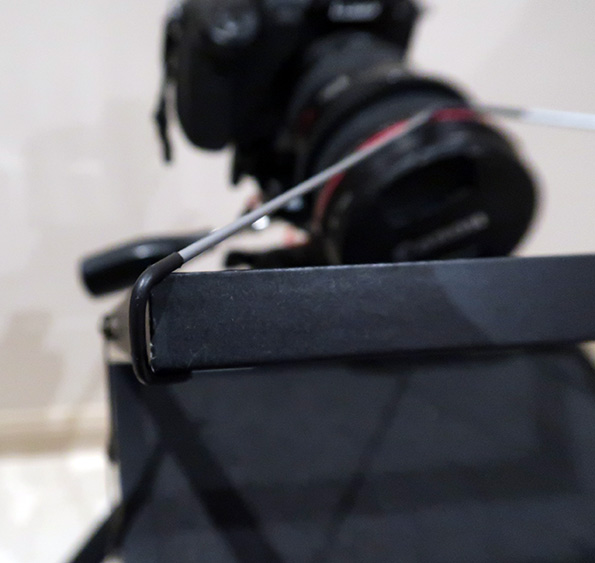
The bottom of the V will rest on the lens, and the top arms of the V will clip onto the teleprompter frame.
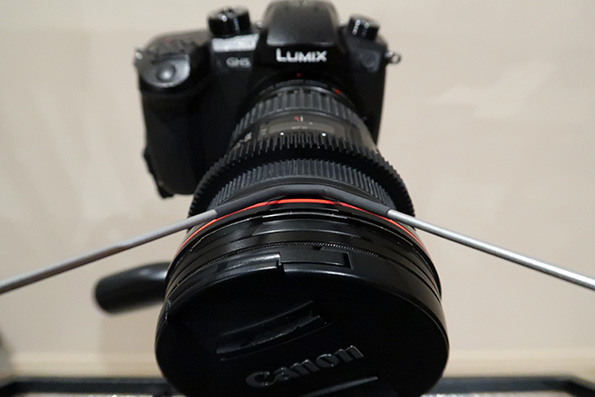
Use heatshrink tube on the bottom of the V to prevent the hood support from scratching the lens and also at the top of the arms, so that the hood support can grip the frame when mounted.
This hood support will prevent the hood cloth from drooping in front of the lens.
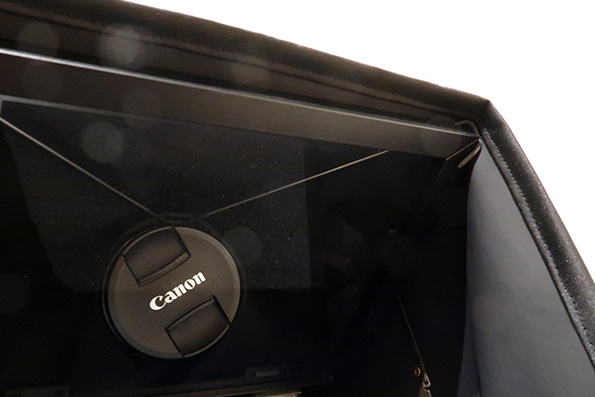
Be careful when using the hood support, as it has a tendency to spring out from the top arms and could possibly scratch the glass or the lens. This is most noticeable when installing, adjusting or removing the hood.
You could attach velcro to the corners of the frame that can secure the top arms in place. Another option is to use eyelet screws or similar, that require the arms to be inserted into it, to lock it more securely in place.
Teleprompter Hood
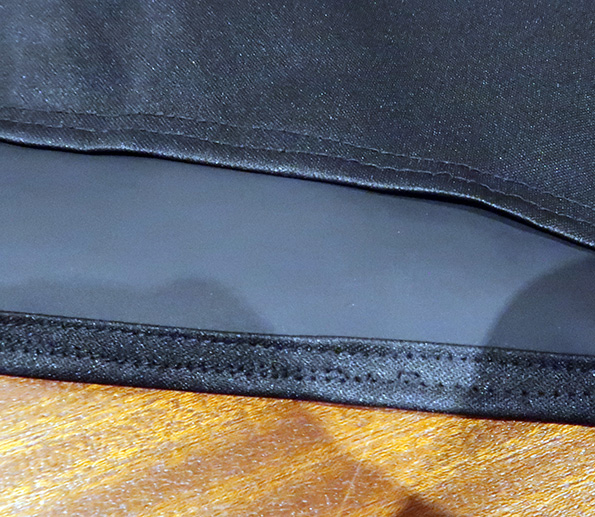
Using the black raincoat cloth, fold and sew trimmings to the matte side of the cloth to strengthen it, and add support and shape when using it as a hood on the teleprompter.
The matte side will be the inside of the hood as it is not reflective unlike the shiny side.
Remove the lens cap and attach the hood support to the teleprompter.
Please note that I have kept the lens cap on in the photos, as these photos are for illustration purpose only.
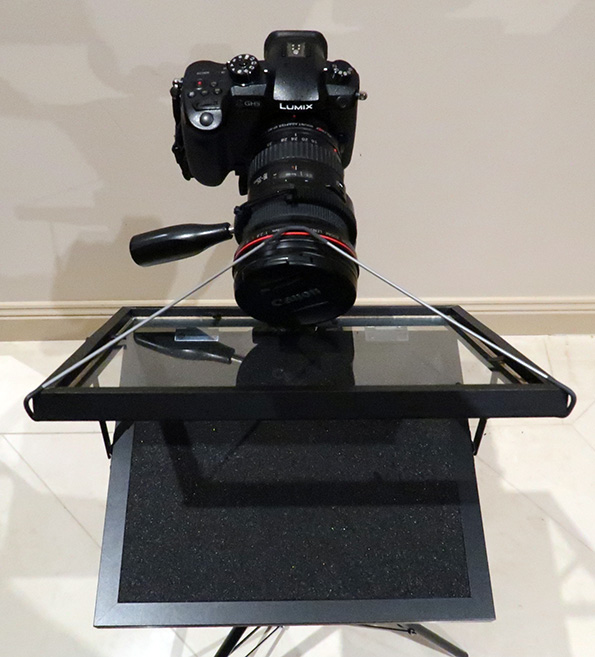
Wrap the hood around the prompter, hood support and camera lens so that it encloses it without letting any light in.
Use the first clip to join the hood at the front of the teleprompter.
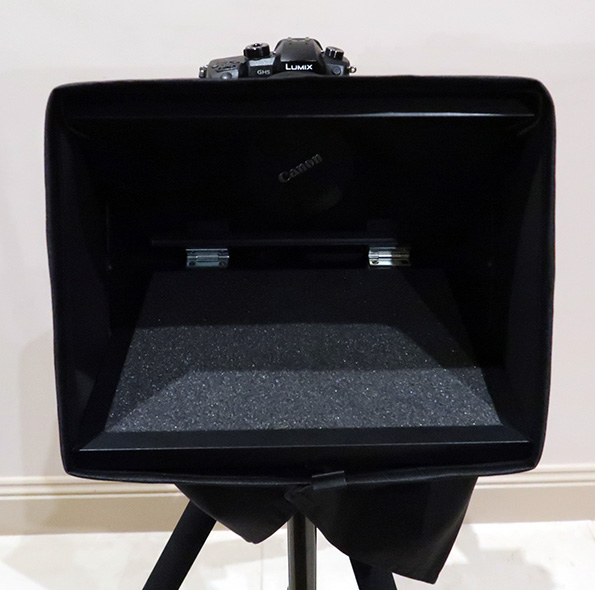
Use the other clip to close the gap where the lens is.
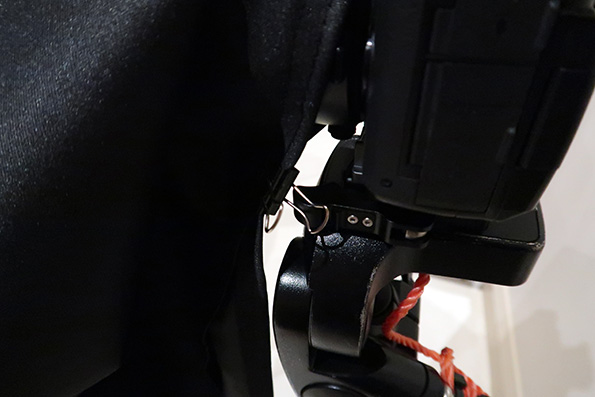
Even with the hood on, you will still be able to slide your hand underneath and between the cloth where the lens is, so that you can make adjustments to the lens such as focus or zoom.
Note: If you plan to make changes to the focal length by zooming your lens in or out, please make sure that your lens barrel does not physically move in and out, as you will change the distance between the front lens element and the teleprompter glass. This may result in vignetting in your video or damaging the teleprompter glass, if the front lens hits it when you are making adjustments. Zoom lenses such as the Canon 16-35mm f2.8 Mark II Lens do not change lens barrel length when you zoom in and out, but certain Micro Four Third zoom lenses (M43) such as the Lumix 12-35mm f2.8 Mark II Lens does.
Hood Extension – reduce unnecessary glare
Check to see if you are getting glare or reflections from the tablet that is affecting the text being displayed on the Teleprompter. If you are, then you need to use the Hood Extension Support to extend the hood and reduce any unwanted light going to the tablet.
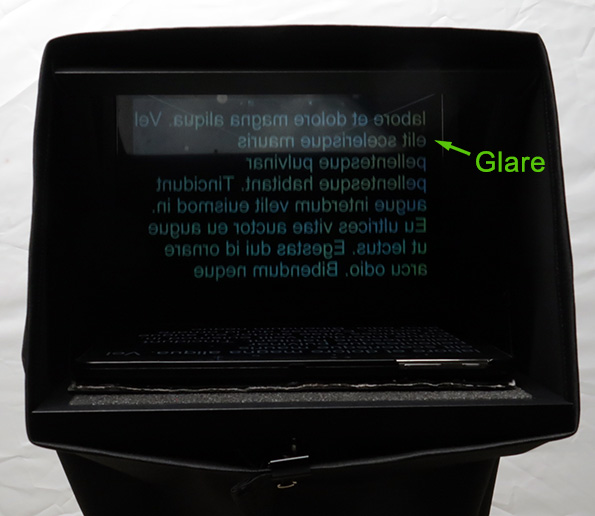
You may also need to use flags or scrims, or any type of light blocking boards to help manage any unwanted light coming into your Teleprompter from your surroundings.
The Hood Extension Support can be created using any thin cardboard or plastic as long as there is enough rigidness to maintain a flat shape once the hood is over it. Once you have chosen a suitable material, cut the board to a tapered shape as shown in the image below, so that it can be inserted down the top of the hood.
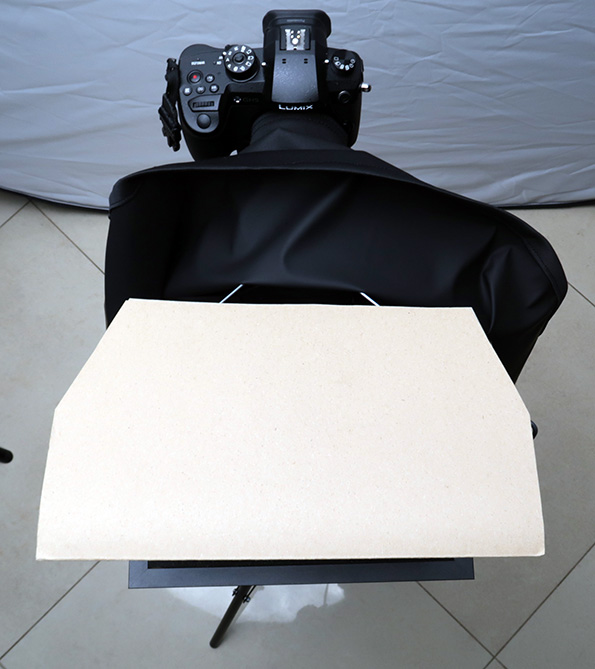
To accommodate the Hood Extension Support, the top hood lip needs to extend out greater from the top Teleprompter frame. The top edge of the hood should be visually flush with the edge of the bottom frame, so that it can shade the tablet from unnecessary light and form a rigid extended hood.
Insert the Hood Extension Support in between the hood and the frame until the support is flush with the edge of the top hood.
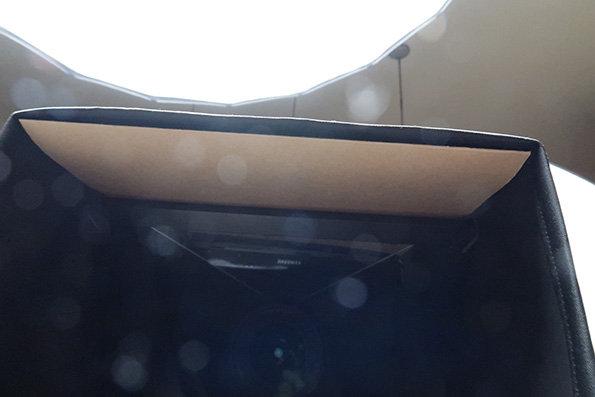
Clip the bottom of the hood, once the Hood Extension Support and top of the hood are in a suitable position.
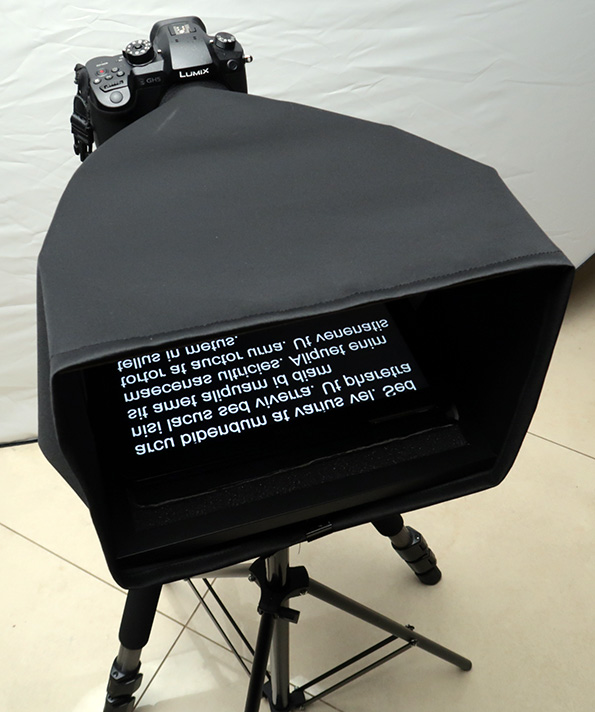
In Use
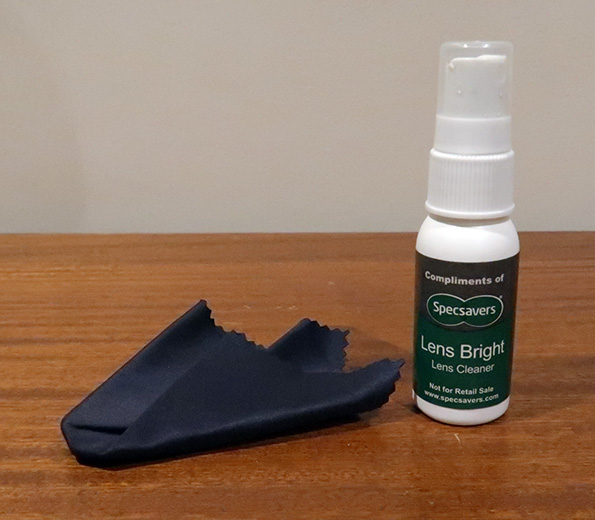
Clean the glass before each use as it can easily become dirty when storing. Use a prescription glasses cleaning fluid and cleaning cloth to wipe the glass clean.
There is some noticeable ghosting of text when using standard glass as the reflection happens on both the front and back surface of the glass.
This can become more prominent, depending on the angle you are viewing the glass, as shown below.
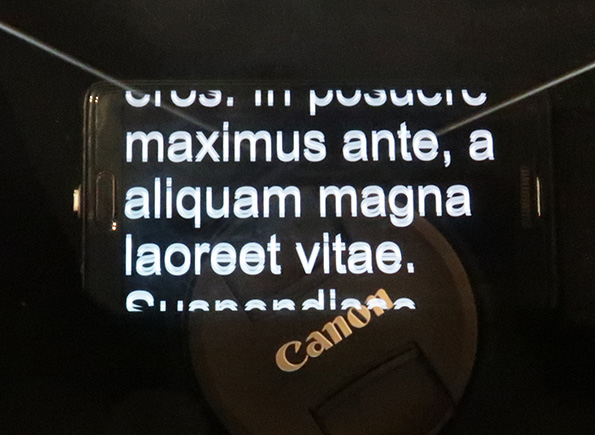
To help with clarity, use white writing on black background with your teleprompter app.
You can use proper 70T/30R Beam Splitter Glass, one-way mirror glass, one way Perspex, etc. which will provide much better results, but the price can be expensive!
Beam Splitter Glass
The cheapest 70T/30R Beam Splitter glass I was able to find cost $29.99 USD + $33.25 USD shipping + $6.32 USD GST = $69.56 USD from Glide Gear. I would consider purchasing this glass if it wasn’t for the expensive shipping cost!
If you are planning to use a glass that is possibly slightly bigger than the original picture frame glass like in my situation with the Beam Splitter glass, then use steel mirror mounting corners and modify it so that the hole tabs mount on the sides of the frames.
The glass will be held into place on the outside of the frame using the mirror mounting corners.
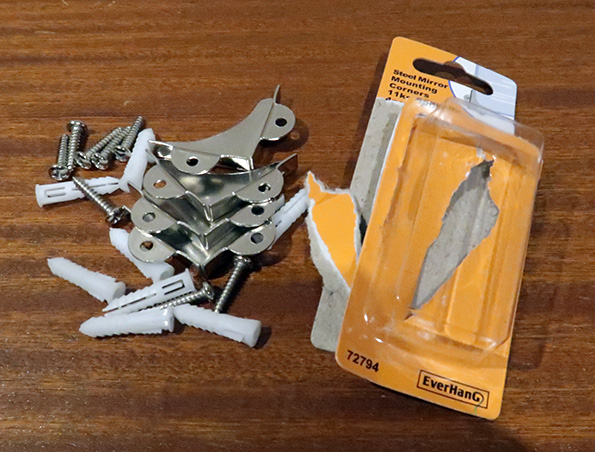
I may update this article in the future if I decide to purchase the beam splitter glass and incorporate it into this DIY Teleprompter.
Attaching to a 15mm Rod System
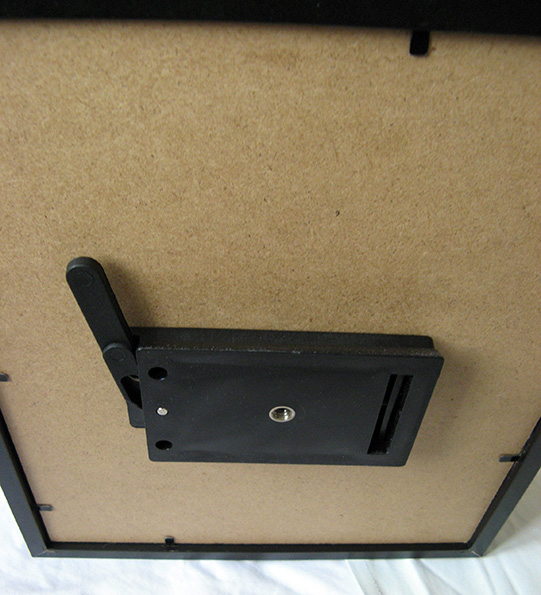
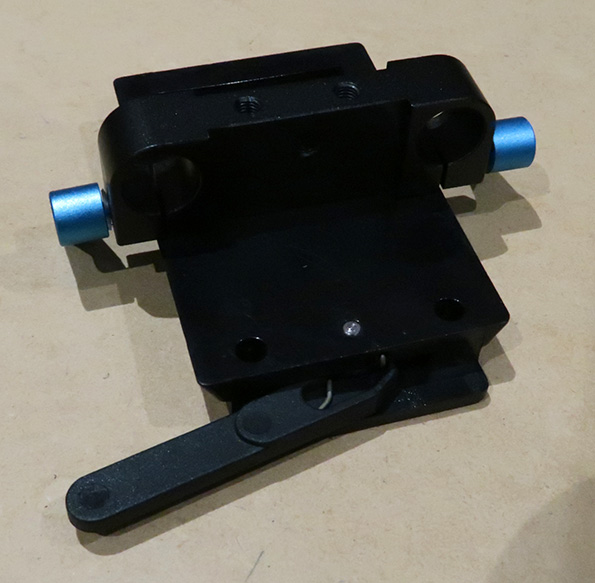
This teleprompter is a separate module from the camera but if you would like to integrate it to a 15mm rod system, you could do it, by attaching the bottom quick release clamp attached to the bottom of the teleprompter with a 15mm rail clamp.
You can then use the 15mm rail clamp to attach to a 15mm camera rig setup if there is enough rod length available from the camera rig.
Packing the Teleprompter for Storage or Travel
Fold the hood to a rectangular shape so that it can clam wrap itself around the teleprompter.
Insert half of the folded hood into the teleprompter so that it covers the inside of the glass.
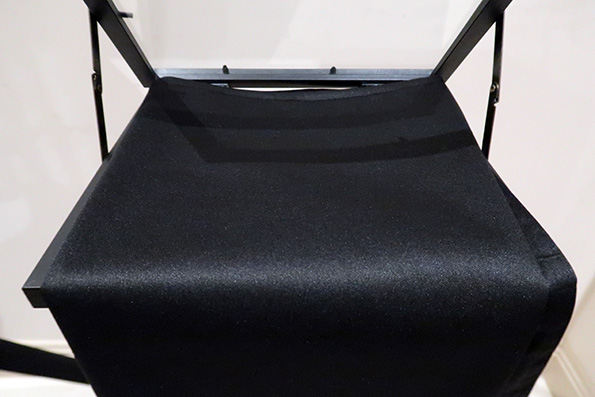
Close the teleprompter and fold the other half of the hood over the outside of the teleprompter so it covers the top of the glass.
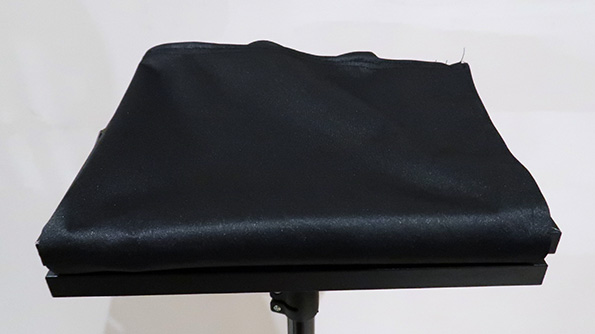
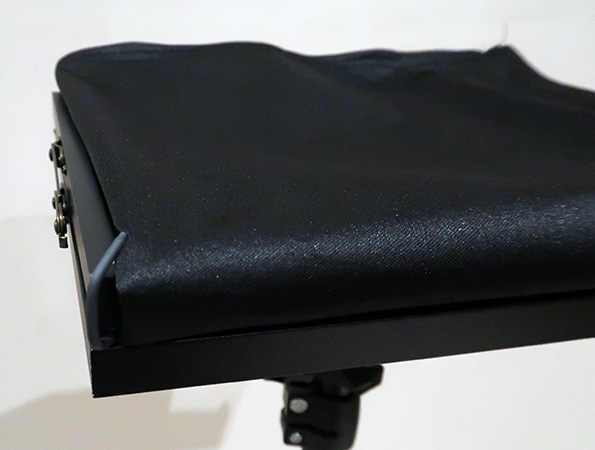
Insert the hood support between the cloth and the foam and not the glass side! The hood support should NOT be touching the glass at all, as it can scratch it!
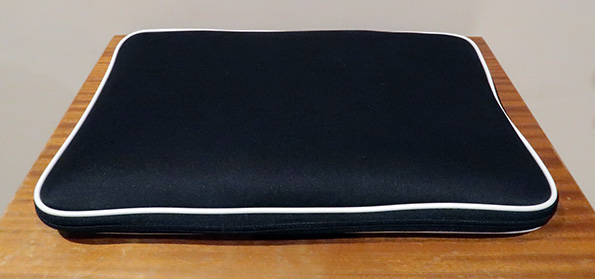
Place all your teleprompter accessories into a plastic bag. Then place the teleprompter and plastic bag inside the 17′ neoprene laptop case.
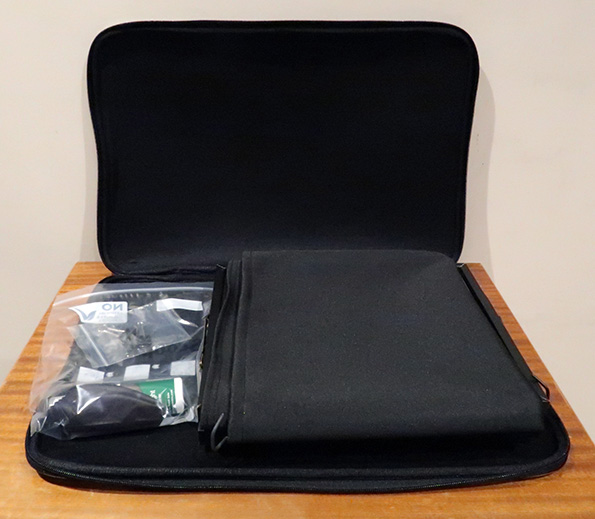
Close the case and handle with care when transporting as it can be damaged in it’s soft case.


Feedback
*To embed code in Feedback, insert code between "pre" tags.