:: Go to In use and comparison video samples
:: Go to Pros, Cons and Conclusion
Parts list
Please refer to the parts list and images on this article to see how I converted my tripod into a camera shoulder rig.
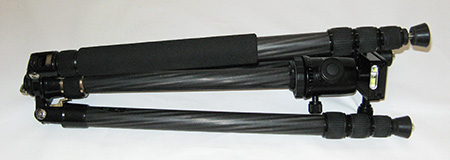
Travel tripod
I used a travel tripod that can also be used as a mono-pod made of carbon fibre because it was lightweight, easy to carry and not bulky. This made it easy to use when converted to a camera shoulder rig. If I had known what I know now after developing the shoulder rig, I would have bought and used an aluminium travel tripod instead even though it is a little heavier because it allows me to attach the crossbar pole and U-bolts on the actual tripod leg poles themselves rather than at the metal joiner. It would have given me more mounting position options for the crossbar pole which is useful when I am trying to achieve maximum comfort and best camera accessories positioning. Attaching the crossbar and U-bolt to the carbon fibre leg poles will damage them which I discovered when I first attached the crossbar pole to them and used the shoulder rig.
There are various brands of travel tripods out there and they all look and function pretty similar but I guess one of the most important aspect when converting a travel tripod to a shoulder rig is the angle of the tripod legs when spread out. I was lucky that my travel tripod legs spread at angles that suits my body but other tripods may not be the same.
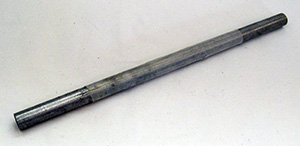
16mm rod
I use this rod as a crossbar pole that locks the two front tripod legs together that I use as my shoulder rig handles. This pole is also used to mount my camera accessories such as external light, external monitor, audio recorder, etc.. I can attach magic arms with clamps to this pole to allow customisation of the position of my camera accessories. I used a spare 16mm aluminium rod I had which were bought from my local hardware store but any other similar rods would do like a curtain rod.
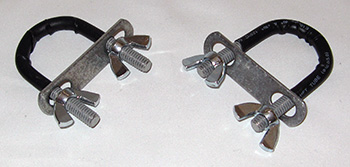
U-bolts set – 25mm (2)
These U-bolts are used to attach the crossbar pole to the tripod legs or joiner. The size of the U-bolt will depend on the size of the crossbar pole and the shape of the part of the tripod the crossbar pole is attaching to. I brought the pole and tripod to my local hardware store to help me find the correct size U-bolt for my setup.
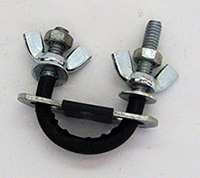
U-bolts set – 20mm, 1/4 thread
These U-bolts uses the same size thread as those on tripod heads and because of this, I was able to attach camera accessories such as portable lights, 7 inch monitors, audio recorders, etc. to my DIY camera shoulder rig. I attached one of these U-bolts on one end of my crossbar pole and I had to shorten one of the U-bolt’s ends to allow me to rotate the camera accessory I was trying to attach to it.
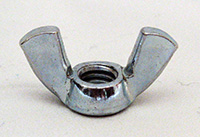
Wing nuts
I replaced the standard nuts used in the U-bolts with wing nuts to allow me to attach, remove or loosen the U-bolt with ease quickly and prevent me from having to use a wrench.
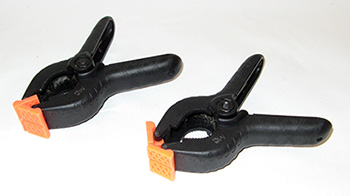
Plastic Spring Clamp (2)
These are used as stoppers for the counter weight. I positioned one for the front and the back of where I would like the counterweight to be positioned on the tripod leg. This also acts as a hook so that the tripod leg does not slide off my shoulder. These can be bought at a local hardware store and come in various shapes and sizes. I picked one that provided sufficient grip on my tripod leg so that the weight did not move and big enough to hook onto my shoulder. I noticed that these pinch your shoulder slightly when the shoulder rig hangs off your shoulder and it made my shoulders sore the next day. I guess it is to be expected since it is not shaped to my shoulder and it is not padded. Something I may need to revise in the future to improve comfort.
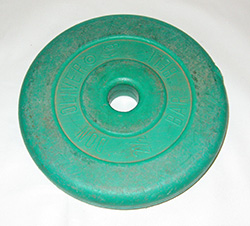
Plastic gym weight
This is the counterweight to my camera shoulder rig that prevents it from being too front heavy. If the weight is too light as a counter balance, I can either add a heavier weight or extend the tripod leg of my counterweight further so that it’s further away from my back. Another option of counterweight is to attach your camera bag instead but any sort of fashioned counter weight could do, even a shopping bag filled with sand tied to the tripod leg would work. One thing I noticed though is that the further down the bag is from the tripod leg causes the bag to swing when you turn with the shoulder rig which is unwanted momentum when you are trying to be accurate with your movement.
Gyms weights can be purchased at any fitness equipment store. I prefer to use the plastic or rubber version because I found it doesn’t damage things as bad as metal weights when dropped. Also it is not prone to rust.
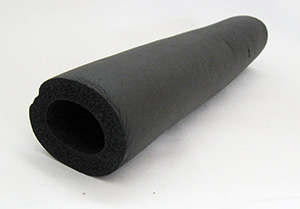
Pipe insulation
These are used as shoulder padding for my shoulder rig. I attach this to the tripod leg that mounts on my shoulder. I found that this is not as effective as I would like it to be especially if you have a lot of camera gear mounted on your shoulder rig and a heavy counterweight attached. Eventually I would like to build a thicker and more contoured shape shoulder pad for my shoulder that I could attach to the tripod leg. At the moment, using the shoulder rig fully loaded with camera gear and using this pipe insulation as shoulder padding for long periods of use is like someone digging their knuckles into your shoulder or doing squats at the gym with a weighted bar. The next day my shoulder felt bruised and sore. I may try wearing a thick jacket than just a thin shirt to see if I can minimize the effects of soreness and bruising when using the shoulder rig.
Heatshrink (various sizes)
I used various size heatshrink on the crossbar pole and U-bolt to prevent damaging my tripod and to provide better grip when attached.
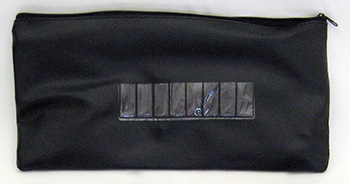
Pencil case (large)
I used a large pencil case as a carry pouch for all my tripod shoulder rig part. This made the whole system manageable when I have to transport it.
:: Go to In use and comparison video samples
:: Go to Pros, Cons and Conclusion


Feedback
*To embed code in Feedback, insert code between "pre" tags.