Disclaimer
The writer of this article cannot be held responsible for for any form of damages that may result from the use of the information in this article. By reading this article, the user is effectively in agreement that the writer is completely exempt from any liability. If you do not agree, then do not read this article!
Introduction
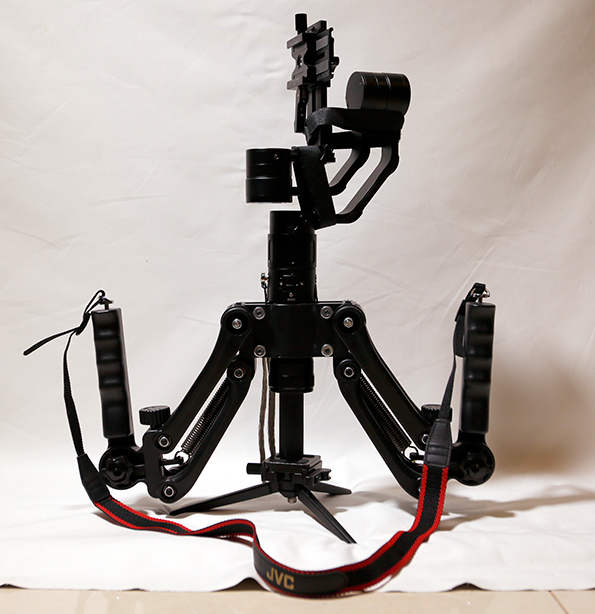
If you own a Single Handle Gimbal Stabiliser and one of these cheap moulded ABS plastic 4th(Z) Axis Stabilisers, then here are some hacks to help improve its portability, stability, storage and efficiency.
The Z-axis Stabilizer and also known as the 4th Axis Stabilizer or 5th Axis Stabiliser is a device used to help minimise the z-axis or bobbing motion created, when using your camera/video camera or Gimbal attached to a camera in a shoot. It’s mostly used when you are moving with the camera and trying to minimize any vertical movement created from your movement, or horizontal motion. Applications can include when you are shooting whilst you are walking or running on flat or inclined ground, up or down steps, or holding the camera in general.
It is effective in minimising the vertical motion to some degree and it is dependent on the motion you are creating, how you have set the device up, your skill at keeping your arms as horizontal and stable as possible, and the equipment you are using.
There are various brand names and models of these plastic 4th Axis Stabilisers but they all seem to be the-same product produced from China but just re-branded. They can be purchased online from $50 to $100 USD at various sellers on Ebay, AliExpress, Amazon and other online retail stores. Do a search for “4th axis stabiliser” or “Z-axis stabiliser” and you should be able to see a listing of the products I am referring to.
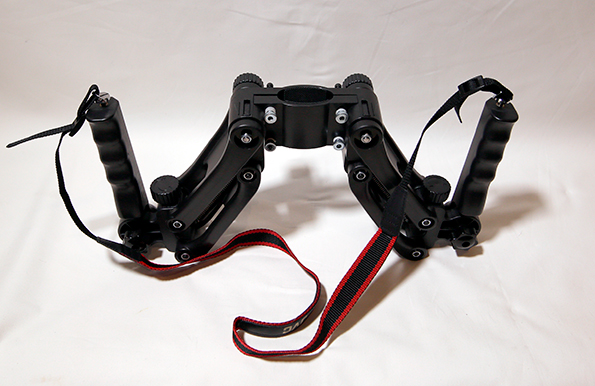
For the price, these cheaper moulded ABS plastic Z-axis Stabilisers are great value when comparing them to its competitors such as the metal type iKan Flex Handle Stabiliser or 3D printed Scotty Makes Stuff 4th Axis Stabilisers.
There are still some debate on how effective these types of stabilisers are, and this is one of the reasons why I place an emphasis on value for this product as I believe they seem to be as good or even better than its competitors of similar features and functions but at a cheaper price.
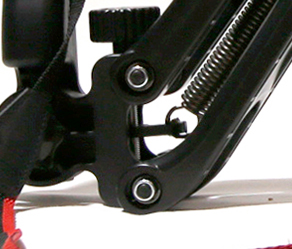
As for durability, only time will tell but I do believe that the metal z-axis stabilisers would be more durable, are smaller, compact and more portable than these plastic models. I do see that the plastic hooks where the spring attaches on the plastic arms could possibly become problematic after continuous general use. It is possible that consistently applying some form of lubricant to these areas may minimise wear.
This is not a device I intend to use everyday as it still takes a substantial amount of space, set up time and inconvenience especially if you are a solo shooter or minimalist when it comes to film-making. But with planning, this can be a useful tool to have, if you know the type of shoot you are doing and feel the need to use such a device.
Improving Stability, Control and Endurance
Due to the arms continual flexing, and it’s inability to lock into a position when required (which could be a feature that these z-axis stabilizers could implement in their future versions), means that making adjustments to the system when holding it, is difficult. By utilising the ¼ tripod mounts on each handle, you can attach d-ring screws and attach a neck strap to it.
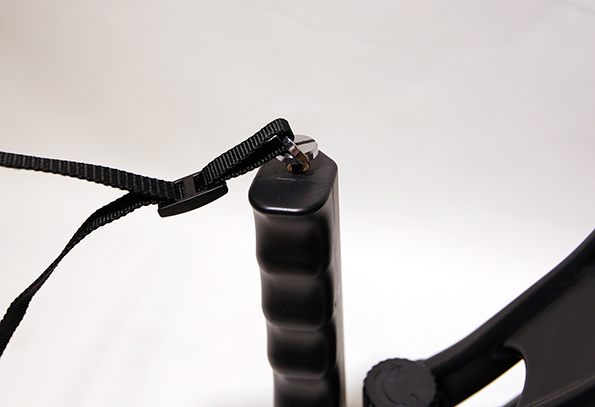
This will enable you to let the Z-axis Stabilizer hang off your shoulders while you adjust the setup. Another benefit to this, is that you can use the neck strap as support to help apply better control of the z-axis stabiliser whilst you hold it with your hands. Avoid placing it on your neck though as this could give you neck problems.
Also having that extra support can help with your endurance especially if you have to hold the Z-axis stabilizer rig for long periods.
Gimbal clamping system
One of the major issues I have with this z-axis stabiliser is the gimbal clamping system. This is quite cumbersome and time consuming to use and is an area where you could get frustrated using. It uses a nut and Allen bolt system which means you need to carry an Allen key whenever you need to adjust, install or remove the gimbal or clamp.
The nut it currently uses can be replaced with M4 Knurled Thumb Screws which makes removing or loosening the nuts much easier since you can do this now with your fingers. You may need to apply some pressure on the bolt side to ensure it does not spin when turning the thumb nuts. Make sure that you place plastic washers between the thumb nuts and the plastic clamp to cover the original nut insert holes and to minimize any damage that may occur when turning the thumb nuts.
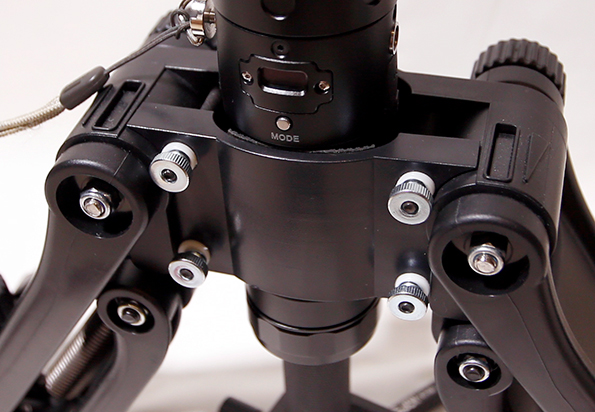
It is very easy to lose the thumb nuts and washers when setting up or removing the gimbal from the z-axis stabilizer, so carry spares just incase.
There is some clearance between the thumb nut and the plastic pivot arms, but due to the length of the bolt, the thumb nut when turned can rub against the pivot arms if angled incorrectly, so be careful when turning it.
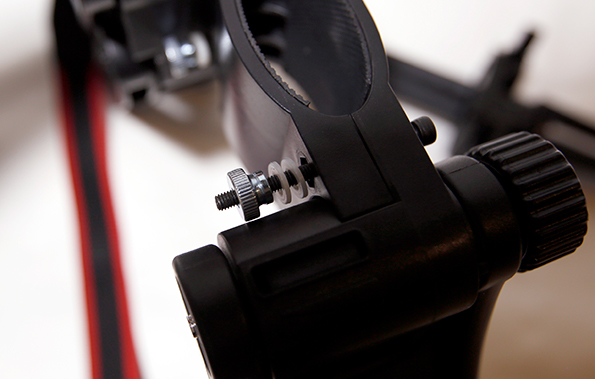
The clamping system is still a cumbersome area to use even with the nuts replaced, as the gimbal clamp does get jammed when you try to adjust it, install it or remove it from the z-axis stabiliser. I notice that this is mainly due to the tight fit of the system, the plastic clamp flexing when moved, the thread getting snagged with the clamp and the uneven tension from the bolts and nuts securing it.
Adapting for shorter and thicker Single Handle Gimbals
For those who prefer the z-axis stabiliser to be more in the middle of the single handle gimbal when holding it, then clamping the gimbal from the middle of the handle is the best approach. Attaching the z-axis stabiliser to the bottom of the gimbal handle like with the iKan Flex Handle Stabiliser, makes the z-axis stabiliser rig top heavy which I find more unstable to use.
The only issue with clamping the gimbal is if you have a short thick handle gimbal like the Beholder EC1 where the shorter length prevents you from attaching a mini tripod stand underneath the handle so that the z-axis stabiliser rig can stand on it own without the arms hitting the ground first.
To solve this issue, I purchased a Joyking mini tripod, Arca quick release clamp and a ¼ handle grip, and attached it to the bottom cap handle of the EC1.
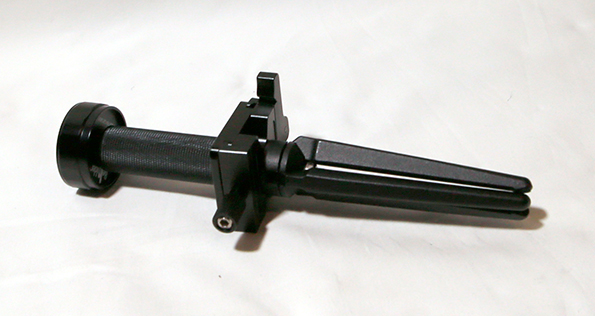
This gave me enough height so that the Z-axis Gimbal Stabiliser Rig can stand on the mini tripod stand than the Z-axis arms. Having a stand allows me to balance the camera and adjust the setup more easily.
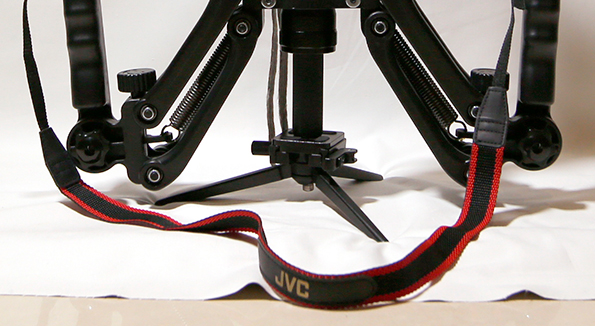
For further hacks, please watch the following short video which outlines other things that you can do to help improve your 4th Axis Gimbal Stabilizer Rig.


Feedback
*To embed code in Feedback, insert code between "pre" tags.