:: Go to Issues and Conclusion
Instructions
What I have provided is a parts list with parts links, some basic instructions and guides. This forms the basis of how I built my motorized system for my camera slider with the most difficult being, building the motor and idler holder and trying to get the alignment as best as possible between the idler, pulley, belt and camera mount bracket. You may use this article as a guide and work out for yourself what your needs are by using your own camera slider as the basis for it.
There are numerous motorized systems and motorized sliders on the web and also many video tutorials on YouTube which you can use to help you get ideas and inspiration on how to build your own.
Parts List and Instructions
• Commercial camera slider
Any camera slider will do (commercial or D.I.Y.) that has smooth sliding motion such as those sliders using bearings or bushings. The smoother the slide, the less strain on the motor.
• DC motor, 12 volts, 6mm shaft
The motor you use will depend on the speed you would like the camera to travel. A 150rpm motor was suitable for me, it allowed my one meter camera slider to slide from end to the other in approximately 8 seconds on maximum power and 1 minute on slow power. Slow power is not zero on the speed controller but about a quarter power where it allowed the slider to move the camera very slowly and smoothly. The heavier the camera, the greater power is required to move it.
• Motor Speed Controller
There are various pre-built DC motor speed controllers available out there and it all depends on the features you want. As for me, I prefer an On/Off/Directions switch and speed controller knob.
• Pulley – GT2, 40 tooth, 6.35mm bore
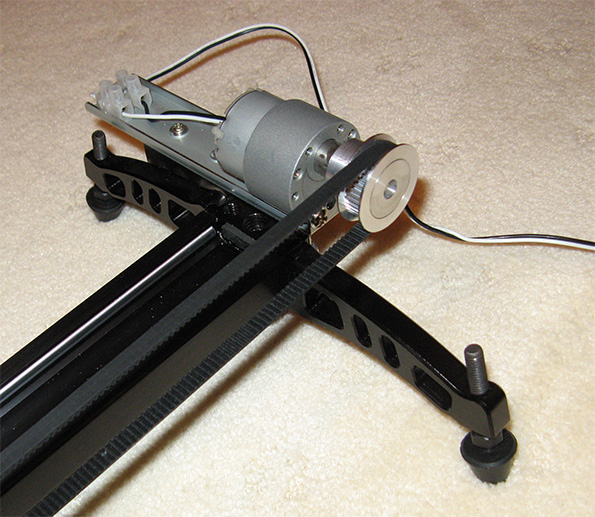
This pulley attaches to the motor and drives the belt. I had to wrap the motor shaft with heat shrink for a tighter fit since the motor shaft is only 6mm and the bore on this pulley is 6.35mm. Adding the heatshrink to the shaft prevents the pulley from buckling when spinning.

• Idler pulley wheel
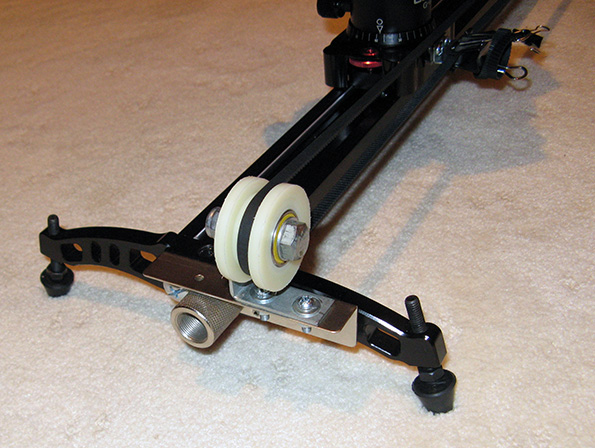
The idler’s purpose is to allow the belt to spin at it’s end. It is important to make sure the holder you create for the idler is solid, firm and does not flex to prevent your belt and pulley system from misaligning to each other. A slight misalignment in your belt, pulley and idler will cause the belt to move to one side on the idler and grind. This will affect the smoothness of how the slider is moving. The pitch on these must match those of the timing belt!
• GT2 Timing Belt – 2.4 meters
This belt is used to drag your camera mount from end to end on your slider. I ordered a little extra length to cover the pulley and idler which adds to the total length needed for the belt to run from one end to the other. The pitch on these must match those of the pulley!
• 12 volts battery pack
The battery pack is needed if you would like to make your motorized system portable. Alternatively you can use a 12 volts DC power adaptor to power your motorized system. The amperage of the power adaptor will depend on the motor you use and the speed controller specifications and requirements.

• Printer port switchbox case
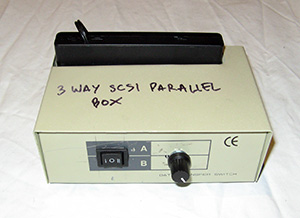
I used an old parallel port switchbox case that I had lying around because it was broken. Any container or project box can be used or you can buy one at your local electronics store. Just find a size to suit your needs.
• AA Batteries (8)
I use Eneloops or Energizer batteries to power my motorized system. Installed these in my 12 volts battery pack.
• 1/4 thread screws (2)
This is to fasten your motor and idler holder to each end of your camera slider. D-ring screws allows for quick and easy installation and removal without using a screwdriver. There should be 1/4 and 3/8 mounting holes at each end of your camera slider.
• 3/8 thread screws (2)
This is to fasten your motor and idler holder to your camera slider at each end. D-ring screws allows for quick and easy removal without using a screwdriver. There should be 1/4 and 3/8 mounting holes at each end of your slider.
• 8mm bolt and nut, washers
This is used to mount your idler pulley to your idler holder that you have built. Use the washers when your screws or bolts are too long or when holes are too big for bolts, screws or nuts. These items can be sourced at your local hardware stores like Bunnings, Mitre 10, etc.

• L brackets, plates, panels for motor, idler holder and camera mount bracket.
This is where you need to get creative and build some type of holder or mount that will hold your motor and idler pulley which you can attach to your camera slider to. You also need to make a small L bracket that you can attach to the camera mount of your slider so that you can attach the belt to it.
Motor and Idler holder
I made four L bracket for my motorized system, a set that would hold my motor and idler pulley and another set that I mounted to my camera slider. I then attached the holder L brackets to my camera slider L brackets. Any piece of metal container or box can be cut out to form an L bracket. Look around the house for any scrap metal boxes, curtain brackets, computer case parts, external hard drive parts, electronic case parts, etc. If you are having difficulties in finding one at home, then go to your local hardware store and talk to staff about what you are trying to build and what you are looking for and they should be able to make some suggestions. There are various L brackets available at your local hardware store that you can customise to suit your needs. I suggest you design something on paper first so that you have a better idea on what your requirements are, ie. size, shape, strength, etc.
Camera Mount bracket
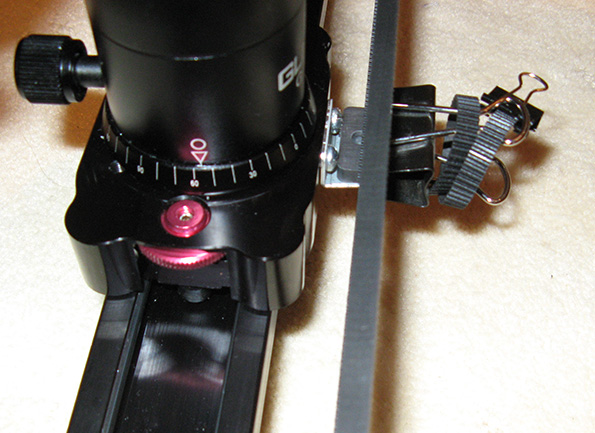
I used a bracket that I found in an old pile of computer parts that I had stored away. I am not sure what it was and where it came from but all I know is that it was computer related. I cut it down to size and shape, and attached it to my camera mount of my slider. I use document clips to fasten the belt to the camera mount bracket.
• Wires and cables
I used speaker wires and some scrap electronic wires I found to wire up my motorized system.
• Plugs and sockets
I used a 3.5mm stereo jack and socket to connect the motor to my speed controller and DC input cable to connect my battery pack to the speed controller. This is not necessary and you could just straight wire your motorized system without using plugs and sockets.

• Document Clips
I used standard document clips to fasten the belt to the camera mount bracket because it allowed for quick fastening, removal, alignment and readjusting of the belt. The method of getting the belt tension right is to first use the small clip to lock the belt ends together to the tension you like. This forms your belt loop that goes around the pulley and the idler. Once you are happy with the tension, you then move the camera mount with the bracket attached into position where both ends of the belt loop overlap. You then attach the large document clip onto the overlapping belt loop ends and camera mount bracket so that they are both securely held in place to each other. When the motor turns, and the belt moves, so does the camera mount bracket that is attached to the belt. Any excess belt from the belt loop you created can either be trimmed off or rolled into a ball and held in place near the camera mount bracket as shown in the image above. Make sure the excess belt is tucked away neatly and does not interfere with the movement of the camera slider otherwise the footage will not be smooth. I suggest trimming the belt to about 2 cms of excess belt so that it allows you enough length for fine adjustments of the motor and idler positions.
Important Building Notes:
- Pulley, Idler and Camera Mount Bracket must be in line and level with each other.
- Belt must be tight if you would like to use the camera slider in an angle.
:: Go to Issues and Conclusion


Feedback
*To embed code in Feedback, insert code between "pre" tags.